I know…I made pasta again. I can’t help myself – it’s so easy and fun to experiment with the abundance of extra ingredients you can use to enhance your pasta recipes.
I came across this beautiful squid ink recipe from A Drunken Duck food blog and had to try it out for an early Mother’s Day surprise for my in-laws. I made a few adjustments and also made an alternative dairy-free filling for my husband that I’ll share towards the bottom of this post. Both versions were absolutely delicious – the squid ink added a beautiful dark color to the ravioli with a subtle salty flavor and the rich lobster filling paired beautifully with the roasted red pepper sauce.
Pasta
2 1/2 cups “00” Tipo Flour* (I use this brand)
3 eggs
Pinch of salt
2½ teaspoons squid ink (or cuttlefish ink)**
Lobster Filling***
1 tablespoon of butter
1 small shallot, minced
2 ounces Brandy or Armagnac
8 ounces steamed lobster meat, chopped (I purchased 3 lobster tails and there was more than enough meat for this recipe so 2 should be sufficient)
8 ounces mascarpone cheese
Red Pepper Sauce
4 tablespoons butter (or dairy free butter)
6 tablespoons all-purpose flour
8 ounces lobster or fish stock
2 large red peppers, roasted
⅛ teaspoon white pepper
⅛ teaspoon cayenne pepper
salt to taste
Pre-heat oven to 400. Line a baking sheet with foil and roast the peppers in the oven for about 40 minutes. Make sure to turn the peppers 1/2 way through roasting. Once roasted, place peppers in a bowl and cover (this will steam the peppers which will aid in peeling off the skin).
Next, prepare the squid ink pasta. In the bowl of your stand mixer, add flour and salt and make a well. In the center of the well, add the eggs and squid ink and combine utilizing the flat attachment on low for about 30 seconds. If mixture seams a little dry (when you pinch dough between fingers it should stick together) add in 1 tablespoon of cold water. Switch the attachment to the dough hook and knead the dough for another 2-3 minutes on low. Remove the dough from the mixer and knead by hand on a lightly floured surface until dough comes together in a ball. Cover with plastic wrap and let rest for about 20 minutes.

Meanwhile, bring 1 inch of water to a boil in a large pot. Place a steamer basket over water, insert tails, cover and steam until meat is just opaque and very plump, 5 to 6 minutes. (do not overcook or meat will begin to shrink and dry out) Remove tails and let cool slightly. Once cooled, slip the tip of kitchen shears or heavy scissors into the middle of the hard rounded side of each lobster shell and cut down all the way to the tail fan, being careful not to cut meat. Remove meat and set aside.
In a large skillet, melt 1 tablespoon of butter over med-low heat. Add shallots and cooking until soft, about 5 minutes. Add in the brandy and simmer for about 2 more minutes. Add chopped lobster meat and cook for another minute or so, turn off heat and set aside.
In a large mixing bowl, cream the mascarpone with the back of a wooden spoon. Gently fold in lobster mixture and refrigerate until ready to fill.
Your pasta dough should be fully rested by now. Divide the dough into 4 pieces. Roll one of the pieces out to about 1/4 inch thickness. Using the KitchenAid® pasta roller pass it through the 1 setting and fold the dough over. Pass through again and repeat until the dough is smooth. Lower the setting to 2 and pass through. Continue until you are at the 5th or 6th setting. The pasta will be long – hang it from a pasta drying rack while you roll out the additional pieces of dough. Next, flour your work surface with flour.

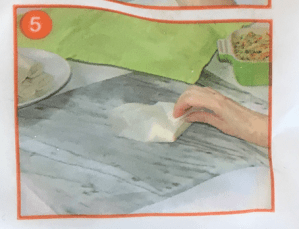
Lay one sheet out and place a spoonful of lobster filling towards the bottom half of the sheet. Continue across, allowing enough room in-between to cut the ravioli. Before folding over the top half of the sheet, brush cold water around the filling to help seal the ravioli together. Fold over layer and seal using your ravioli stamp (I purchased these from Amazon). Alternatively, you can use a ravioli maker to help form the pockets. Repeat with remaining pasta sheets.

Before you cook the raviolis, let’s prepare the sauce. Prepare the peppers by peeling off the outer skin. Then puree them in a blender until smooth and force the mixture through a fine meshed sieve. In a saucepan, melt butter then add the flour. Whisk vigorously for 3 minutes until the roux begins to thicken. Cook for another 2 minutes, stirring occasionally. Add in the fish stock and whisk together over low heat. Add in the pepper puree, salt, pepper and cayenne. Keep sauce on low-heat until pasta is ready.
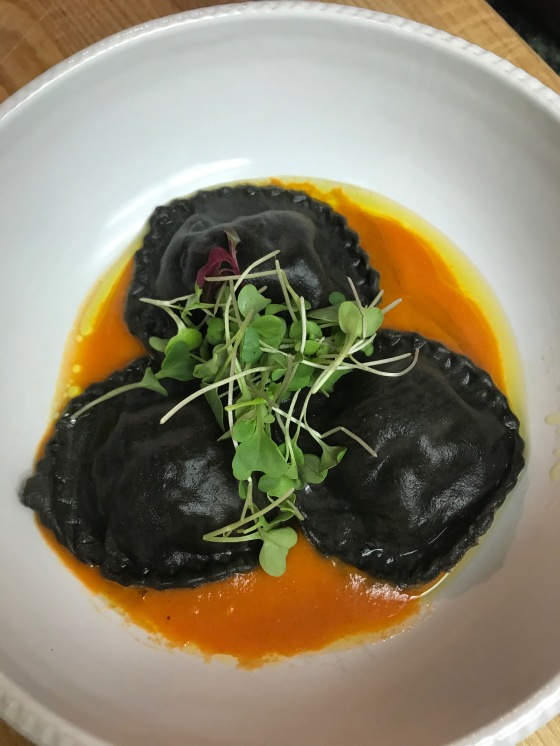
Bring a large pot of salted water to boil. Cook raviolis for about 5 – 7 minutes, drain and serve with roasted red pepper sauce. I also added a little olive oil to the plate before serving.
*If you don’t have 00 flour, you can substitute for all-purpose.
**You can purchase squid ink from specialty stores like whole foods, sprouts or online.
***Dairy Free Lobster Filling: 1 tbsp. dairy-free butter, 1 small shallot (minced), 2 oz. Brandy, 8 oz. steamed lobster meat (chopped), mascarpone substitute (blend together 8 oz. of dairy-free cream cheese and 2 tbsp. dairy-free butter. Add a splash of soy or almond milk if needed).